

Solar panels are the stars of the residential solar system, gleaming on the rooftop as they tell the world, or at least the neighborhood, that this homeowner cares enough about the environment to ease the household’s carbon footprint while smartly lowering electric bills.
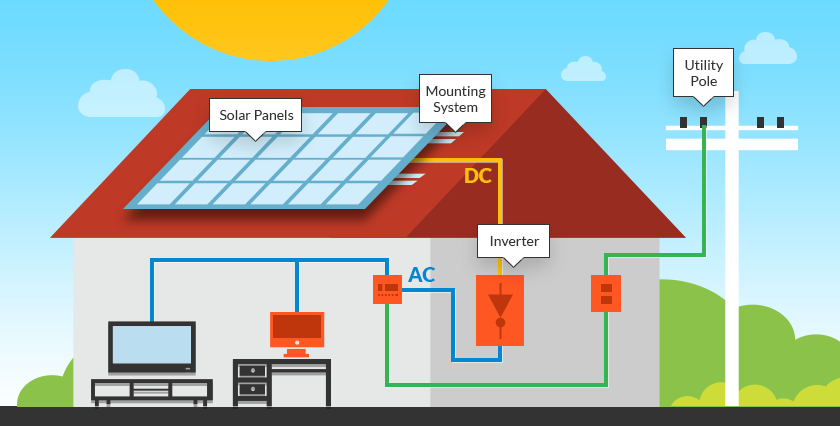
Panels get the glory, but like every star, they wouldn’t be where they are without the supporting cast. In this case, that supporting cast is the critical infrastructure made up of inverters, racking and monitoring systems. These essential parts of your solar power system help make the power useable, connect your system to the roof and let you know how well your system is functioning.
When planning your solar rooftop system and working with your contractor, most of the focus will be on the solar modules themselves as well as labor costs and installation timetables. The inverters, racking and monitoring systems often get lumped together. Innovations in materials and processes in these three areas have resulted in lowered materials and labor costs and even lengthened warranties on the products.
Solar Inverters: From DC to AC Power
If not for inverters, solar panels would be relatively useless for homeowners. Once the solar panels have collected sunlight and changed it into DC power, an inverter is needed to convert that electricity into something more useable, notably AC power.
Here’s why that matters: DC (direct current) power is low voltage and flows in a single direction. AC (alternating current) power moves both forward and backward along a wire, can change between high and low voltage and can more easily be sent long distances over wires. Solar panels make DC power. Most U.S. homes and businesses run on AC power. Thus, the inverter – or inverters, depending on what a homeowner chooses for his solar system.
Comparing Inverters: Central vs. Micro vs. Power Optimizers

Breaking Down the Differences
Solar panels are connected in series to form a string. The string connects to one large inverter where the DC power is converted to AC power.
$$ (typically $1,500 to $3,000)

Shading of one panel brings the output of all the panels down

Can’t tell the performance of individual panels, only the system as a whole.
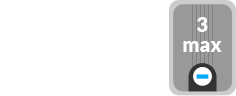
A central inverter can only have a certain number of solar panels, so adding panels later can be a problem.

Solar panels must be lined up in the same orientation to the sun to produce similar current.
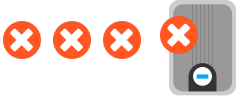
If the one inverter breaks, the whole solar system shuts down.

The most used inverter configuration.

As they handle the entire electric load, central inverters last 10 to 15 years.
Each solar panel has its own small inverter attached to its backside. The DC power is converted to AC power at the panel level.
$$$$ ($150-$200 per panel)

Panel outputs are independent of one another, so shading on one panel does not impact the output of the others.
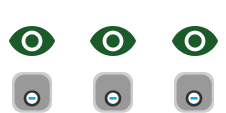
Individual monitoring of each panel allows for easy identification of where a problem is.
More solar panels with micro inverters can be added to the array easily.

Because the panels perform independently of each other, they can be oriented differently without impacting the system.
If one panel’s micro inverter breaks, the other solar panels can continue to produce power.

Catching up to central inverters, used in 41% of residential systems in 2014.

20 to 25 years
Used with a central inverter, power optimizers are attached to each panel in the array. They condition the DC power at the panel level before it moves on to the inverters.
$$$ ($70-$100 per panel)

Similarly to micro inverters, the power output is individual to the panel so shading or other problems with one panel don’t bring down the whole system.
Similarly to micro inverters, power optimizers allow for individual monitoring of each panel.
Can only have the number of panels the central inverter can handle.

No need to match panel orientation.
If one panel’s power optimizer breaks, the others can continue to produce power. But if the central inverter all the panels are connected to breaks, the whole system shuts down.

Gaining traction in the module-level power electronics sector due to lower cost.

20 to 25 years
Don’t skimp when it comes to the inverter just to save money. Some experts even suggest getting an inverter that can handle more than expected in case you want to add panels later.
Solar Mounting Systems: Maximizing Energy Production
No matter the weather, your solar panels need to stay solidly on your roof. That’s where the solar panel mounting system comes in.
Traditional Rooftop Mounting System

Rooftop installation costs can vary quite a bit based on the type of roof and its substructure, solar array design and from region to region, based on typical wind and snow conditions.
Generally speaking, roof mountings are more complex than ground or pole mounts. However, residential installations tend to be roof mountings because that is the highest and largest clear space on the property. Roof mounts are fixed mounts, which means that the panels do not move with the sun.
But the mounting system, also called the racking system, does more than merely hold your solar panels in place at a 30 to 45-degree angle. The mounting determines the solar modules’ alignment with the sun. The better aligned the panels are, the higher the power production.
Learn more about optimum solar panel placementThe parts of the mounting system typically are included in what’s called the balance of system costs. Each mounting system has to be customized to fit the project. Efficiencies have lowered these costs to around $0.17/w. Declines in the cost of aluminum as well as optimized designs have contributed to the drop in mounting costs, according to studies by the National Renewable Energy Laboratory. The installation of the mounts and modules take up about 70 percent of the total installation time.
Learn more about racking and inverter costsIn the past, mounts have primarily been rails that are attached to the roof. Then the panels are attached to the rails. Now, rail-less systems are becoming more common, so much so that rails are expected to become a thing of the past.
Expected Growth of Rail-less Mounting Systems in U.S. Residential Solar Market
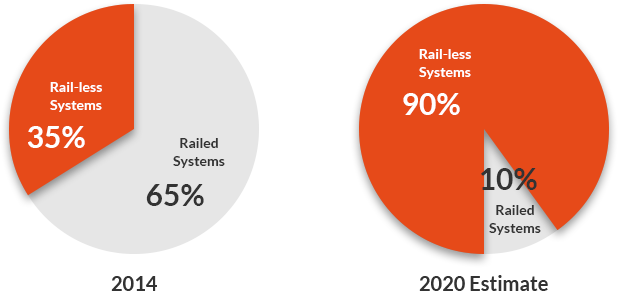
Source: SunCentric
Rail-less mounting systems remove the extra step of putting on rails, which is more costly because of materials and labor costs. Because there are fewer parts to install, costs are lower in rail-less systems.
The type of roof that the mounts will be attached to can make a difference in the mounts that are used.
Mounting solar panels to the more brittle shake or Spanish tile roof will be more expensive than installing panels on a composition roof because different materials will be needed and more care will be needed by workers walking on an easily breakable tile roof.
Properly installed solar panels should not invalidate your roof warranty. However, before installing solar, take a look at your roof paperwork. If the warranty is nearly expired, you might want to replace the roof, and therefore the warranty, before adding solar panels. Otherwise, if you unfortunately spring a leak, it will be much more expensive to repair.
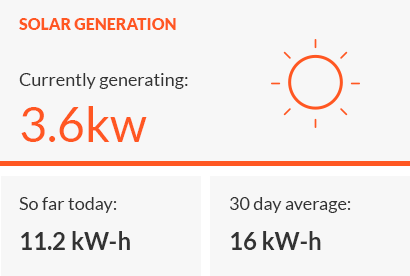
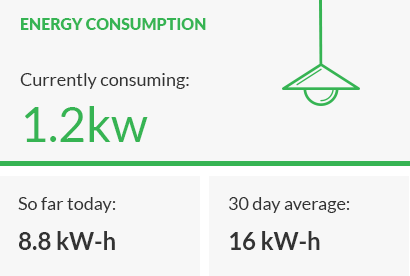
Monitoring Your Solar Panels Performance
Solar panels silently go about their business of gathering sunlight and producing energy, which makes it hard to tell how effectively they are working. If a panel on your string inverter gets shaded, the entire string will be affected and won’t produce the energy you were expecting. Unless you want to wait until your utility bill gives you the bad news, a monitoring system can be invaluable.
Monitoring systems help you to measure and track how much electricity your system is producing and identify and promptly fix any performance issues so that you are maximizing the production of electricity from your solar system.
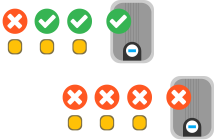
Central Inverter Display
MICRO Inverter Display
There are two basic types of monitoring systems: on-site and remote. They are just as they sound. The on-site system is physically located on your property and recording the requisite data. A remote monitoring system involves the PV system transmitting data to a monitoring system that you can access online or by phone.
Monitoring systems can be as simple or elaborate as you want and can afford. Some homeowners might find the inverter’s basic display gives enough information. The display is on the front of the unit and includes basic data, such as power output and daily and total energy production. Many inverter manufacturers also offer free data-monitoring software that you can download from the company and run on a computer connected to the inverter by a cable. More sophisticated monitoring systems, which can range in price from about $400 to $1,300, will show problems that occur at the module, string and system levels and can include:
- Real-time performance data for individual modules and the system overall
- Immediate fault detection
- Dollar value of the energy produced and site profitability analysis
- Interactive charts and playback features showing the harvested power of your installation during a specific time
- Pounds of CO2 saved
Most small-scale systems do not require a large amount of data collection, however, data junkies and solar geeks will appreciate the amount of data they can pull.
Some companies, such as Solar World, offer a monitoring system that includes a portal in which users can publically display the data from their solar modules so they can compare it with others. In addition, certain systems allow installers to monitor performance as part of a maintenance agreement.